An Introduction to Alloy Pipe: Techniques for TIG/GTAW Welding Success
Print Article
While alloying elements such as nickel, chromium, molybdenum, copper and cobalt add greater mechanical properties to carbon steel pipe, they also makes the pipe more difficult to weld. This article focuses on the techniques required from welder's perspective, so that he or she can make the transition from TIG welding carbon steel to TIG welding alloy metals such as stainless steel, duplex stainless steel, Inconel® (Ni-Cr, Ni-Cr-Mo and Ni-Cr-Co-Mo alloys), Monel® (Ni-Cu and Cu-Ni alloys) and pipe from related alloys.
Pipe made from highly alloyed metals requires a higher level of GTAW proficiency to meet the standards required power generation, nuclear, petrochemical, food, pharmaceutical and processing industries.
While alloying elements such as nickel, chromium, molybdenum, copper and cobalt add greater mechanical properties to carbon steel pipe, they also makes the pipe more difficult to weld. This article focuses on the techniques required from welder’s perspective, so that he or she can make the transition from GTA welding carbon steel to GTA welding alloy metals such as stainless steel, duplex stainless steel, Inconel® (Ni-Cr, Ni-Cr-Mo and Ni-Cr-Co-Mo alloys), Monel® (Ni-Cu and Cu-Ni alloys) and pipe from related alloys. While each alloy has its own specific considerations, enough similarities exist.
Slow Down, You Move too Fast
Alloy metals have a lower thermal conductivity than steel, and the molten alloy weld puddle has a lower viscosity. Because the weld puddle is not as fluid, it does not does not “wet” as readily. The welder familiar with mild steel must physically and psychologically make adjustments. Key among them: slow down! Slow down for stainless steel, slow down more for duplex stainless steel and slow down even more for nickel alloys. Traveling to quickly can lead to problems like cold lap.
Do not attempt to compensate for a sluggish puddle by increasing weld current. Using more current than the weld procedure dictates will vaporize (“burn out”) the alloying elements, leading to corrosion and reduced service life. For this reason, use a low to moderate heat input, visually inspect all welds for indications of excess heat input, typically a color change. This step is critical.
Keeping the “slow down” advice in mind, the following images and advice showcase the basic steps necessary to achieve good results when welding alloy metals. In several instances, the welder deliberately made mistakes. This will help the beginning welder learn to identify mistakes, their causes and how to correct them.
Weld Preparation
 |
| Weld Backing Gas. Protect the root side of all full penetration welds by using the proper tooling to close off the pipe and purging the atmosphere from the pipe. |
 |
| Something’s wrong. This tack weld shows numerous defects. A sluggish weld puddle that couldn’t be controlled, discoloration that indicates too much heat input and a “star crack” (left) from improper gas coverage and the puddle solidifying to quickly. The cause: no backing gas. |
 |
|
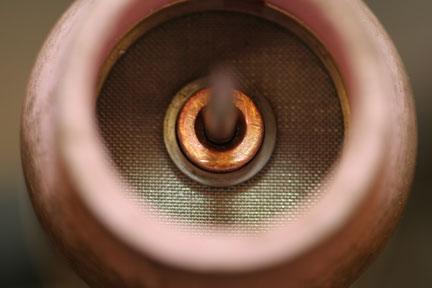
Oxidation on the inside of the pipe, commonly called “sugaring” because of the appearance, indicates poor backing gas coverage.
|
 |
| Shielding gas. Argon may be used for all thickness, but for nickel alloys greater than 1/8-in. thick, adding helium increases penetration and allows for faster travel speeds (consult your local gas distributor for a recommendation for your application). For argon, set the flow rate at 10 to 20 cu.ft./hr. For helium mixtures, increase flow rates by 1-1/2 to 3 times to compensate for helium’s buoyancy. |
 |
| Use a gas lens. To create a smoother, more stable flow of shielding gas and superior shielding gas envelope, always use a gas lens. Use the largest cup practical for the application (here, a size 12 cup is used for 6-in. diameter, Schedule 10 duplex stainless pipe). |
 |
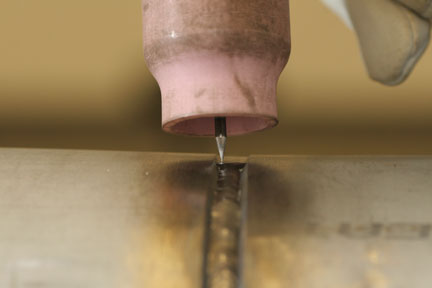
| Tungsten extension. Keep the tungsten extension (“stick-out”) as short as possible, ideally 3/16 in. or less on butt joints. This helps ensure that the welding arc stays within the shielding gas envelope. Thicker material or fillet welds may require extensions of 3/8 to 1/2 in. Use a 2% thoriated tungsten for all welds. |
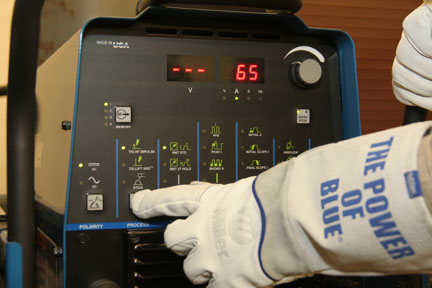 |
| Welding parameters. Set the welder for DC electrode negative (straight polarity). Arc starting methods include high frequency (HF), Lift-Arc™ or scratch start, with the first two being preferred. |
 |
|
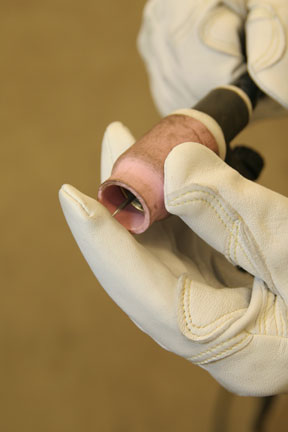
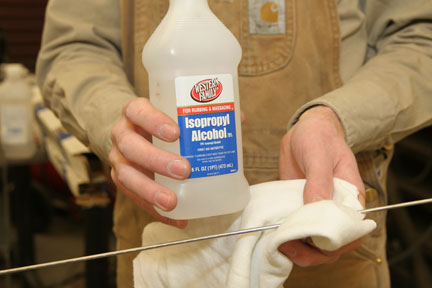
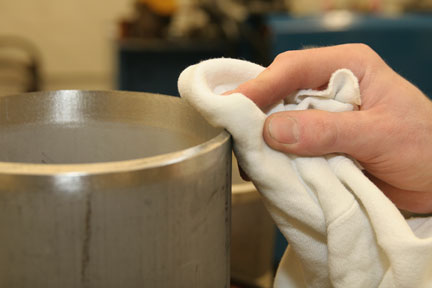
Clean filler rod. Use a chemical solvent to clean the filler rod before use (safety note: remove the solvent and any flammable material away from the welding area before striking an arc). Ideally, wear gloves when cleaning the rod, as even oil from your fingers can lead to contamination. Generally, the filler material should match the parent material. When welding dissimilar materials, match the filler rod to the higher alloy parent material.
|
 |
|
No contaminants. Prior to welding, remove all oxide film from the bevel and 2 inches
back from the joint edge. Use rotary file, hand file or brush made from stainless steel; dedicate these tools to this application. Do not use disc grinders, as the alumina oxide in the sanding medium and gum-based adhesive can contaminant the joint. Next, use a chemical solvent to clean the joint surface. Grease, oil, paint, marking crayons, ink, lubricants, cutting fluid and processing chemicals can contain sulfur, phosphorus, lead and other contaminants can lead to embrittlement. Safety note: remove the solvent and any flammable material away from the welding area before striking an arc.
|
 |
|
Joint preparation. To obtain good fusion on alloy metals, bevel to joint to a wide angle (80 to 90 degrees for a V-groove ), create a narrow land and set a wide root width. This will enable the arc to break down the bevel and ensure complete fusion.
|
 |
| Mind the gap. Pipe welders use their filler rod to set the root gap. This 1/8-in. diameter filler rod should be just on the verge of falling through the root on this 6-in. diameter, Schedule 10 duplex stainless pipe. |
Welding Advice
 |
|
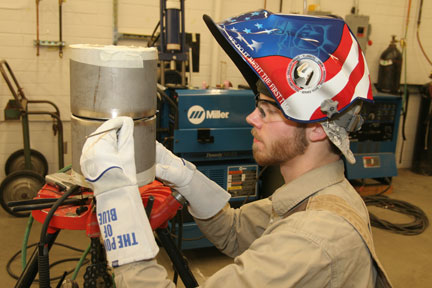
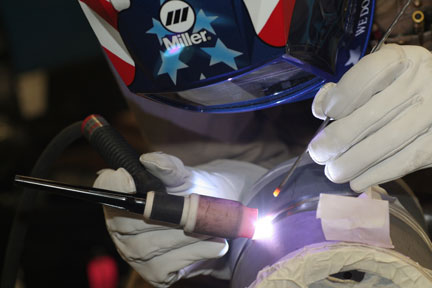
Awkward positions. Pipe welders need to be contortionists. Practice while kneeling on the remote amperage control (shown here), using you elbow or putting the control between your thighs. For added convenience, consider using a TIG welding torch with a remote fingertip control.
|
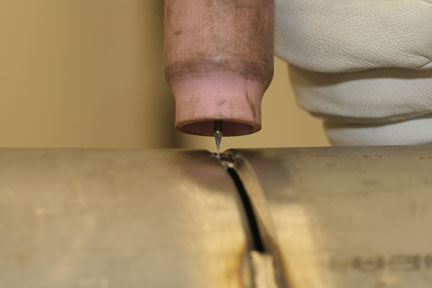 |
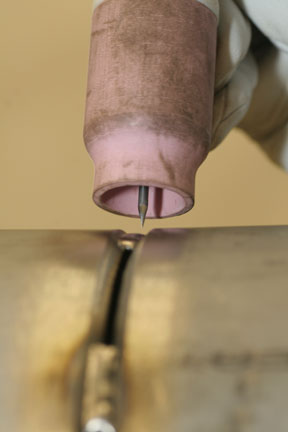
| Get tight. The proper arc length when welding alloy metals is as tight as possible—on the verge of touching the metal. A tight arc produces a well-defined puddle and better directional control, which is necessary when dealing with a sluggish weld puddle. Should the tungsten touch the weld puddle, stop immediately and re-grind the tungsten. |
 |
| Too long, no control. Long arc lengths (shown here) preheat everything but the weld puddle. If the heat of the arc gets to the bevel before the puddle does, it can undercut the edge of the bevel. A long arc may also cause the end of the filler rod to ball up prematurely. |
 |
| See the arc. Welders must put their head in a position so that they can see the arc to maintain good arc length—don’t guess! Generally, this involves being close to the weld. Older welders may find it helpful to use a magnifying “cheater lens.” Complicating matters, the puddle on alloy metals is harder to read because, as alloying elements like chromium and nickel vaporize, they create a film or “haze” of plasma gas over the top of the puddle. |
 |
| Bevel breakdown. The inside of the same tack weld shows how the proper (slow) travel speed and tight arc broke down the bevel and to obtain complete fusion. |
 |
|
Root problem and solution. To illustrate the effects of travel speed, the welder intentionally moved too quickly when welding on the left side of this joint, then slowed down to a proper speed. Notice how quick travel failed to break down the bevel, as indicated by a weld that is narrower than the width of the root opening.
|
 |
|
Angling for success. Keep the torch directed nearly straight at the joint, angling it back just enough to see the arc. Maintain a 90-degree angle (perpendicular) between the torch and filler rod. Angling the torch too much (beyond 15 degrees) directs the heat away from the base metal, preheats the filler wire and may cause it to ball up prematurely, and it may lead to cold lap.
|
 |
|
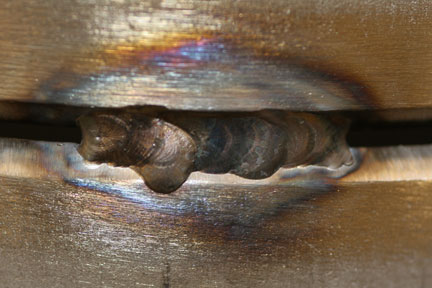
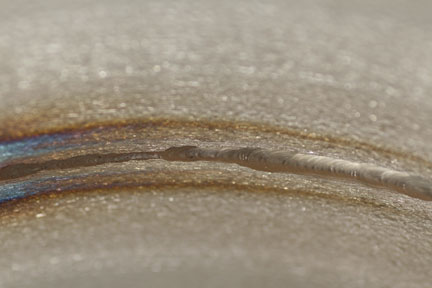
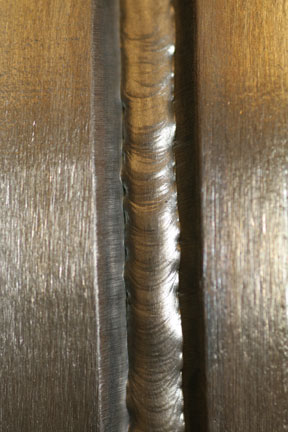
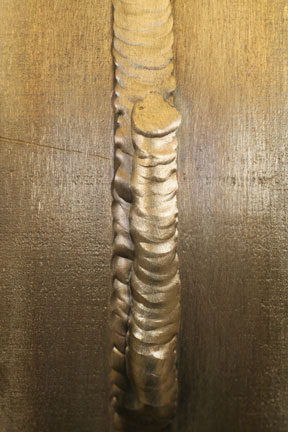
Slightly convex bead. This root pass shows good sidewall fusion and a slightly convex appearance. A slightly convex bead (as opposed to a flat or concave bead) prevents centerline cracking when the weld cools.
|
 |
|
Too convex. This root bead is too convex, which can lead to fusion problems on the hot pass. Breaking down the ropey top of the bead and obtaining good fusion on both sidewalls will be extremely difficult.
|
 |
|
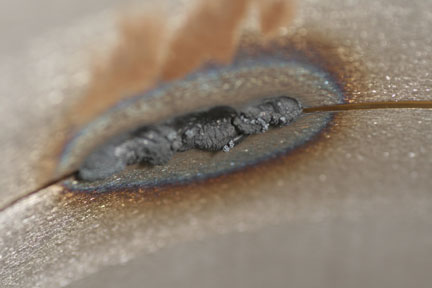
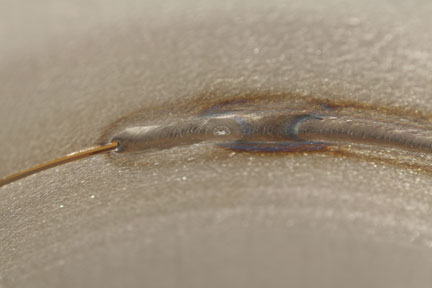
Cracking up. This “star crack” or crater crack occurred because the edge of the weld puddle solidified before the center. To prevent cracking, prepare the tack weld where you’ll end the weld by grinding it down. Then, follow this welding routine: about 1 in. before the end of the weld, bring the puddle down to half its size. This will allow the puddle to solidify or “dry up” from the inside out. After bring the size of the puddle down, increase travel speed to slightly faster than normal while maintaining a tight arc right up to the moment the arc is broken off. Many welders have a problem with star cracks because they increase arc length to help dry the puddle up, which actually causes the puddle to solidify too quickly, causes star cracks on the root bead and causes arc marks on the surface of the pipe.
|
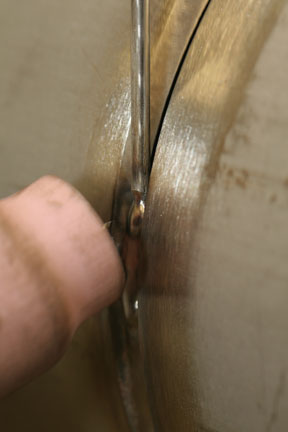 |
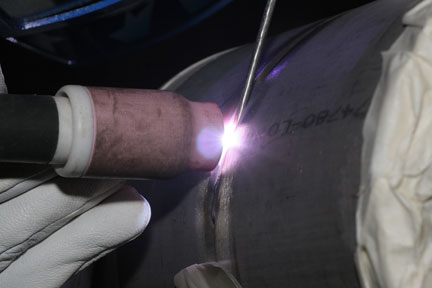
| Tie-in and weld start. To start the root pass, butt the filler rod against the tack weld and fuse it in place (shown here. Note that the tack is not ground or otherwise prepared). Then, step back 1/4 in. and establish the weld puddle on the tack weld, then move forward and bring the puddle through to where the filler rod is tacked and carry on. When pipe welding, note that the filler rod is not dabbed in and out of the weld puddle. It remains in position and is almost “wrapped” into the weld. This technique keeps the rod inside the protective shielding gas and minimizes puddle agitation, which prevents burning out the deoxidizing elements. |
 |
|
Hot pass pause. When welding a hot pass freehand, move the torch from one side, always pausing at the side of the weld to allow the puddle behind the arc to solidify (“dry up”) before moving on. Also, when moving across, adjust travel speed so that about half the width of the joint is molten and the other half solid. Lastly, do not “wiggle” the torch as when cup walking; keep the arc pointed straight down at all times.
|
 |
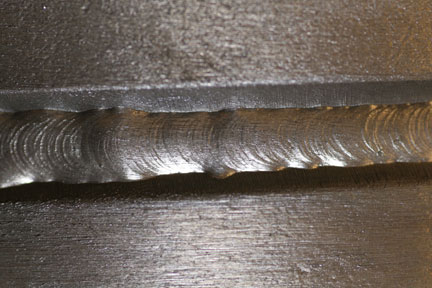
| Stringer beads. After the hot pass, make all subsequent passes using the stringer bead technique. Alloy metals do not flow (“wet out”) readily, so the wide weave beads associated with carbon steel are difficult or impossible to make. |
 |
|
Extended post flow. When welding alloy metals, set the gas post-flow to 5 to 10 seconds longer than normal and keep the torch in position until the weld cools. Prior to using the filler rod again, trim the end off to prevent contamination.
|
Following the steps described above will help welders make the transition from welding mild carbon steel to a variety of alloy metals. While this advice is broadly applicable, always obtain welding procedures for the specific metal on which you are welding. And whenever possible, practice until working with alloy metals becomes second nature. Having confidence in your ability to make quality welds prepares you mentally for passing weld tests, which in turn opens up new job and career possibilities working with alloy metals.
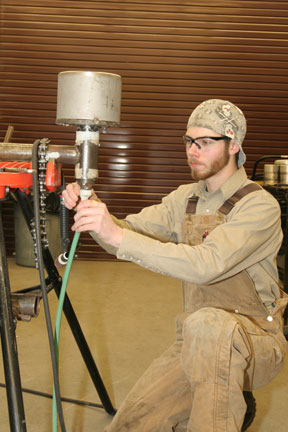
All of the above images depict the work of Frank Carney, a first year apprentice with UA Local 598.
In addition to the authors’ own knowledge, this article reflects more than 100 years of pipe welding experience from Dave Stanley, journeyman welder, UA Local 598; Steve Davis, Joint Apprentice Training Committee Instructor; and Gary Culvert, a 50-year Local 598 member, welding consultant, retired college professor and currently serving on the board of directors at Columbia Basin Community College in Pasco, Wash. Mr. Culvert helped invent the “Hanford” or cup walking GTAW technique.
For dedicating the resources to make this article possible, the authors would like to thank Rick Berglund, business manager, UA Local 598, and Pete Nicacio, training coordinator, UA Local 598.