Inverters play an important part in optimizing space, electrical service and training
Executive Summary: In creating a smooth-running, functional and efficient welding lab, time spent beforehand is well worth the investment…So is choosing the right welding equipment, which can decrease energy costs, increase space and provide arc quality that promotes learning.
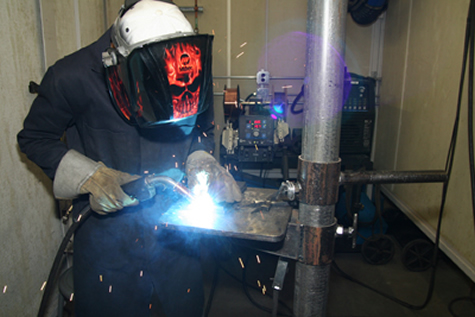 |
Arguably the most important spaces in welding shop design are the individual welding booths. NAIT officials economized on space while also facilitating a comfortable practice environment for students, with room for instructors to supervise.
|
The smoothly functioning multiprocess welding shop strikes a balance between spaciousness and space-efficiency. Shops with large overall footprints can decrease productivity by increasing walking time between various stations, such as work tables, welding booths, cutters, grinders, hydraulic presses and cooling tanks. Conversely, laying out a shop to economize on space – shoe-horning equipment, stations and welding operators in small areas and booths – creates problems too, as welders struggle to work in cramped quarters and avoid collisions with each other and their equipment.
The new four-shop welding school at The Northern Alberta Institute of Technology (NAIT, Edmonton, Alberta, Canada) is an excellent example of how applying ergonomic principles to welding shop layout can achieve a harmonious balance between space and proximity. The result is a streamlined, comfortable environment that offers a logical welding workflow. Bob Clark, associate chair of NAIT’s welding program, adds that if strict space constraints apply, equipment selection can play a critical role in “airing out” snug floor plans.
“We found that 2 X 3 meters [approx. 7 X 10 ft.] is a perfect booth size to accommodate the student, the equipment and an instructor to assist with hands-on skill training,” he says. “Clearly, we needed a smaller power source. An inverter would take up approximately 20-percent less space than a rectifier type unit. Selecting your equipment ahead of time plays a big role in the shop’s final layout.”
 |
|
Choosing the right welding equipment, not only makes cell layout easier, it allows students to train on the same equipment they can expect to use in their professional careers.
|
Accordingly, NAIT selected a variety of Miller Electric Mfg. Co. inverters:
72 Dynasty® 350 machines with controls for high-speed pulsed DC-GTAW (up to 5,000 pps) and AC-GTAW controls for independent EN and EP amperage control, extended balance control (30 to 99 percent EN), AC frequency adjustment (20 to 400 Hz) and four AC waveform outputs (advanced squarewave, soft squarewave, sine wave and triangular wave). The Dynasty 350 weighs 135 lbs. and dimensions H: 24.75 in., W: 13.75 in., D: 22 in.
202 XMT® 350 CC/CV multiprocess units, enabling MIG, pulsed MIG, TIG, Stick, Flux Cored and air carbon cutting and gouging. The XMT 350 CC/CV has a 5 to 425 amp output and a duty cycle rating of 60 percent at 350 amps/34 volts, a weight of just 80 lbs and dimensions H: 17 in., W: 12.5 in., D: 24 in.
10 Spectrum® 1000 air plasma cutting and gouging systems with Ultra-Quick Connect™ torches that enables rapid plasma torch connection and removal. The Spectrum 100 weighs 92 lbs. with a 25 ft. torch and dimensions H: 17 in., W 12.5 in., D 20.5 in.
These machines equip the 120 welding booths comprising the four new welding shops and 60 booths in two existing welding shops for a total of 180 machines for students, in addition to more than 20 demonstrator machines.
A common denominator of these three inverter power sources is their ability to accommodate 575 V 3-phase primary power, enabling each of these machines to draw power from anywhere in the institute without requiring modifying NAIT’s electrical service. In addition, all three inverters feature Miller’s Auto-Line™ technology, which provides three key benefits that improve performance: the ability to maintain a steady arc despite primary power fluctuations with a 190 to 630 V range; a primary power draw of just 17.8 amps at rated output on 460 VAC primary; and the flexibility to accept any type of primary power (190 to 630 V, single- or three-phrase, 50 or 60 Hz) without any physical linking mechanisms.
Getting it down on paper
After determining a power source and an ideal welding booth size for the four 30-booth shops – each accommodating two daily shifts of 30 students and three instructors – Clark and his colleagues turned over this information to an architect, who provided an initial paper layout of the contiguous welding shops. Using pieces of paper cut to scale to represent each additional piece of equipment that needed siting, Clark’s task then was to create a welding shop layout optimized for productivity and efficiency.
It was a daunting task to devise a layout that provided students with the expansive range of tools they would need to perform their tasks in a space that also prioritized short walking distances.
“Some of the booths have multiple power sources, and we also need to make room for cutting stations, work stations and demonstrator stations in the common areas,” he observes. “There is a lot of equipment that you need to lay out logically. The shop has to be ergonomically designed so that you don’t have equipment at different ends of the shop, which increases travel time. These shops operate eight hours a day and it gets hard on your feet if you have to make multiple 100-foot trips. Our final design creates a logical workflow in which students and staff can work with the least travel.”
For example, Clark says, instructors put students’ welded coupons through a guided bend test using a hydraulic press. By locating the presses near the instructor stations, instructors can conveniently record marks as they are being done without walking back and forth. Knowledge of what hasn’t worked in the past also informed the layout process and actually changed some customs, he adds.
“Students used to cut coupons from sheet gauge using hand shears with four-foot long handles,” he remembers. “People kept getting hit by the handles. We didn’t include these shears on the layout and removed them from the existing shops. Our technicians have switched from sheet material to flat bar, which costs more but is more effective.”
 |
| Bob Clark, associate chair of NAIT’s welding program, points out some tool organizers that help keep the welding lab organized. |
Assembling a world-class welding shop
The preceding examples clearly demonstrate that major considerations face the designers of an efficient, productive welding shop, including those related to electrical service, handling of welding gases, floor layout, welding booth organization, fume extraction and cleaning. Here is some insight on how NAIT successfully addressed these issues:
Electricity
Before NAIT officials began specifying welding equipment, they had to select a power option (voltages, amperage ranges) to supply the scores of welding and cutting machines, grinders and presses in the four shops. Clark chose and recommends 575 volt three-phase as the standard.
“We’ve put everything on 575 three-phase power because it’s much cheaper and more efficient than other options,” Clark observes. “About 90 percent of our machines run on 575 three-phase. Standardizing on power decreases electricity costs, which is probably one of the largest expenses in a welding shop.”
After selecting power supply comes the practical matter of siting the electrical service. Clark cautions against reserving too much space on the shop’s interior perimeter wall for welding equipment, as this is prime real estate for the electrical service.
“To avoid re-doing the design on paper, make sure the architect has space to build in not only the main power box, but also a 10-12 foot area on the wall to mount individual panel boxes with circuit breakers for each piece of equipment,” Clark says. “This enables clustering of the circuit breakers, so electricians can go to a single location and know immediately which machine has tripped.”
Gases
NAIT built in a main gas manifold system with drops to each of the 120 student welding cells and 40 cutting stations comprising the institute’s four contiguous shops. Designers need to consider which gases students and demonstrators will use in each shop. NAIT students progress through a three-year program that divides instruction on the various welding processes by program year and shop. The first shop is for first-year students, the two middle shops are for second-year students and the fourth shop is for third-year students.
“In a first-year shop, we need acetylene, oxygen, argon, CO2, water and compressed air. All of NAIT’s student welding booths have argon and CO2 drops, but only the first-year shop’s cells have drops for acetylene/oxygen,” Clark explains. “The designer can help the architect and contractor understand these different needs to make sure the lines come down correctly, that they’re adequately spaced and provide access for replacing or installing flow meters and regulators, and that they’re not going to interfere with any of the power sources.”
 |
| As one of the shop’s three levels of fume extraction, each individual booth and instructor station has a flexible extraction hood that can be positioned right over the work to remove fumes. |
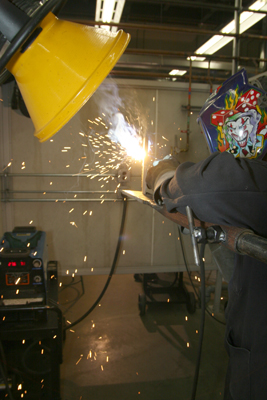
Fume extraction
Clark and his colleagues designed three levels of fume extraction into each welding shop. In four areas of each shop are drops that remove the heavier-than-air gases (argon, CO2) that collect close to the floor.
“With 30 students and three instructors welding in two daily shifts we could get quite a gas accumulation,” he says. “In addition, each individual booth and instructor station has a flexible fume extraction hood that can be positioned right over the work to remove fumes. The third level of extraction is near the ceiling to remove the higher fumes.”
Additional fume extraction in the form of downdraft tables is integrated with the plasma arc cutting machines to draw vaporized metal fumes downward for filtration and cleaning.
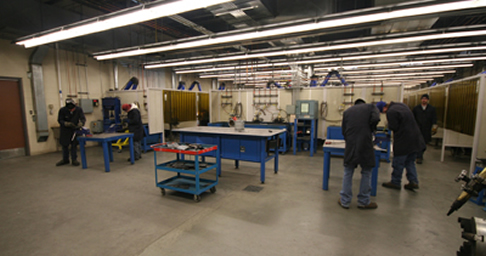
Common areas
For each welding shop, NAIT designers created two large common areas for work tables, demonstrator stations, instructor desks, and instructional TV/DVD stations, in addition to stations for manual oxy-fuel cutting, plasma arc cutting, small pedestal grinders and cooling tanks.
To fulfill its educational mission, the TV/DVD stations run suppliers’ equipment videos and DVDs. Students and instructors can use these Internet-ready stations to visit welding Web sites, such as www.millerwelds.com, and to download additional educational materials (e.g., interactive tutorials on basic electricity and MIG welding).
“If a student is struggling with weld cracking or with the type of welding rod or procedure they’re using, instructors can use a laptop to search the Internet for a better solution or product to recommend to the student,” Clark states. “Welding is becoming such a complex trade. It’s great to be able to plug into the Internet and find the information immediately.”
The common areas in each of the four welding shops are equipped with seven 3 X 3 ft. work tables and two 8 X 4 ft. work tables with vises for hacksawing and filing. The larger tables are convenient for pipe layouts and for students to put their test coupons on at day’s end. Electrodes, consumables and rods are located in each shop’s dedicated storage room, which is monitored by two technicians who restock supplies as needed.
Grinders
NAIT isolated the heavy duty grinders from the common areas and welding cells to cut down on the noise and dust from coupon grinding.
“The noise levels in the shops are so low that you can carry on a conversation with 30 people working nearby,” Clark says.
All the grinders are hooked up to a dust extraction system, which helps extend machinery life.
 |
| With NAIT’s heavy duty grinders isolated from the common areas both noise and dust are decreased. Noise levels in the shop are low enough to allow normal conversation. |
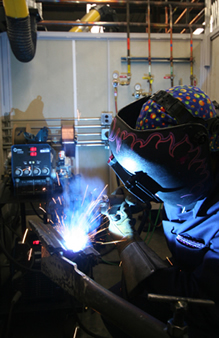
Student welding cells
Perhaps the most critical spaces in welding shop design are the individual welding booths. NAIT officials had to both economize on space while also facilitating a comfortable practice environment for the student, with room for instructors to supervise.
NAIT’s 2 X 3 m welding cells accommodate up to two power sources and dual wire feeders for GMAW, FCAW, SMAW, Stick and oxyfuel in the first-year shop. The two second-year shops are equipped with one power source and dual wire feeders for GMAW and FCAW, in addition to an AC power source for AC TIG. The third-year shop’s cells have a power source with no wire feeder, as these students practice TIG, Stick and pipe welding only.
“The welding machines are mounted on carts, so students can move the cart to sweep in behind and underneath,” Clark explains. “Wall space is taken up by the gas drops and there is a positioner post in each booth that we spent a lot of time moving around before we anchored it to the floor. The final location had to enable the students to easily access their welding machines while reducing the chances that they’ll burn holes in the walls or curtains.”
Importantly, NAIT instructors’ stations are identically equipped to the welding cells, which facilitates instruction, he adds.
“The digital read-out is a nice features of the XMT 350 CC/CV inverters,” Clark says. “When the instructor sets the parameters for his demonstration, students can go back into their booth and set up the same parameters, or fine tune the parameters to their ability.”
Prioritize elbow room in design of welding workspaces
One of the most common mistakes in welding shop design is packing in too many people and machines in the space available, according to Clark.
“You need that work space in the common area around the work tables,” he says. “On test days, in particular, the area around hydraulic presses can get crowded. You can have six students lined up waiting to bend coupons. If your work tables are beside the line-up, then they’re bumping into each other. Someone is getting an elbow in the back when you take a backstroke on a file.
“If you figure one person needs x amount of space,” he continues, “multiply it by 1.5 or two – give yourself a little more space.”
Another example is the grinding rooms.
“We started with eight pedestal grinders,” he recalls. “Once we positioned them – before we bolted them to the floor – we found that the bigger people had to tuck in their elbows tight to their hips or their elbows were pushing the other guys off to the side. So, we actually took out two pedestal grinders and put in just six. The lesson we learned is: make sure you have enough room for the machines, but more importantly, make sure you have room to make the machines operator-friendly.”
Proper Preparation
After seeing the results, it’s clear that Bob Clark’s and his fellow NAIT instructors’ preparation paid off in well-organized, efficient welding labs that promote the learning process. Choosing the right equipment allowed them to maximize space and energy efficiency while training tomorrow’s welders.
 |
| “The shop has to be ergonomically designed so that you don’t have equipment at different ends of the shop, which increases travel time,” Clark says. |