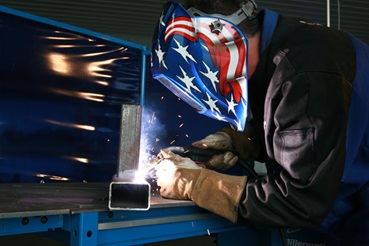
Weld outdoors with ease
Self-shielded flux-cored welding can be an excellent process to use for welders of all skill levels who frequently need to weld outside or on dirty material.
Self-shielded flux-cored welding is a wire welding process in which a continuous hollow wire electrode is fed through the welding gun into the weld joint. It differs from MIG welding in that it doesn’t require an external shielding gas, such as carbon dioxide or argon, to protect the weld pool from contamination. Instead, a flux compound contained within the wire reacts with the welding arc to form a gas that protects the weld pool. Another process, gas-shielded flux-cored welding, does require a shielding gas. It’s often used in heavy-duty industrial fabrication and manufacturing and is not typically recommended for beginner and hobbyist applications.
Because the flux creates the shielding gas in self-shielded flux-cored welding, this process does not encounter the weld problems that can occur when a strong wind blows the shielding gas away when MIG welding outside. The flux contained in the electrode also allows the process to be more forgiving of base metal that is somewhat rusty, dirty or otherwise contaminated.
Flux-cored welding produces a slag that sits on top of the finished weld and must be chipped off. It also tends to produce welds that aren’t as visually attractive as MIG welds. For these reasons, it makes sense to switch to the MIG process for indoor welding.
First things first
Before tackling any welding project, make sure you have the proper safety apparel. Basic welding safety apparel includes leather shoes or boots, cuff-less full-length pants, a flame-resistant and long-sleeve jacket, leather gloves, a welding helmet, safety glasses and a bandana or skull cap to protect the top of your head from sparks and spatter. Also remove any potential fire hazards from the welding area.
Miller offers a wide range of safety accessories for everyone from the occasional hobbyist to the full-time professional welder. Your owner’s manual contains additional information about safety apparel and precautions.
Metal preparation for flux-cored welding
As mentioned earlier, flux-cored welding is more tolerant of surface contamination than MIG welding. However, you should always clean the surface of the base metals as thoroughly as possible to ensure that a rusty or scaly surface does not contaminate the final weld. A metal brush or grinder work well for cleaning the base metals. Also, be sure to clean the portion of the base metal where you plan to attach the ground clamp. Poor contact with the ground clamp will create resistance in the welding circuit and could result in poor weld quality.
For material over 1/4 inch, it’s usually a good idea to bevel the edges of the base materials to ensure complete fusion of the two parts. This is especially true for butt joints.

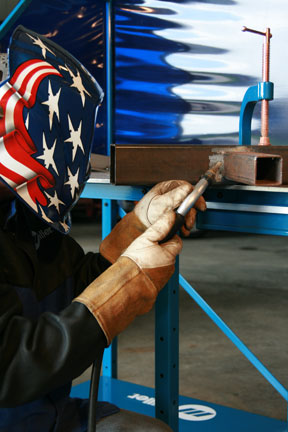
Although flux-cored welding is more forgiving of dirty
metal than MIG welding, it’s still a good idea to clean
off as much surface contamination as possible prior to welding.
Equipment preparation
- Check your cables. Before striking an arc, check your welding equipment to make sure all of the cable connections are tight and free of fraying or other damage.
- Select electrode polarity. Flux-cored welding requires DC electrode negative, or straight polarity. You'll usually find the polarity connections on the inside of the machine near the drive rolls.
- Use the correct drive rolls. Because flux-cored wire is softer than solid wire, knurled drive rolls provide a good “bite” on the wire without compressing and deforming it — which could happen if using standard drive rolls.
- Check wire tension. Too much or too little tension on either the drive rolls or the wire spool hub can lead to poor wire feeding performance. Adjust according to your owner’s manual.
- Inspect consumables. Remove excess spatter from contact tips, replace worn contact tips and liners and discard the wire if it appears rusty.
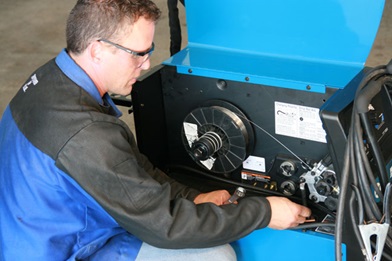
Be sure to conduct a thorough inspection of your equipment prior to welding.
Flux-cored welding wire selection
For general purpose mild steel welding applications, a flux-cored wire with the designation E71T-11 can be used in any position, is available in a wide range of sizes and provides excellent welding characteristics for both thin and thicker material. Hobart® Filler Metals offers such a wire under the name Fabshield® 21B (E71T-11).
As for wire diameter, .030-inch diameter is a good all-around choice for welding a wide range of metal thicknesses. For welding thicker material at higher total heat levels, use .035-inch wire (or .045-inch wire if it’s within your welder’s output range).
Voltage and amperage
How much voltage and amperage a weld requires depends on metal thickness, joint configuration, welding position and wire diameter. Reference charts are available on your power source to help set the correct voltage and wire feed speed based on the wire diameter and material thickness. Our flux-cored welding calculator is also a great tool to utilize. Consider these tools to be rough guides from which you can fine-tune your final parameters based on a few test welds.
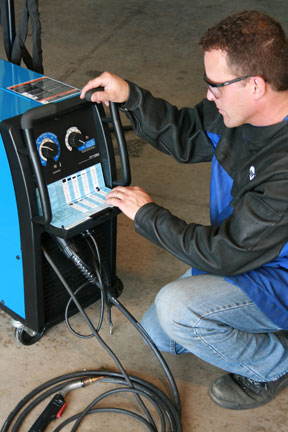
Your power source contains reference charts for setting
the correct electrical and wire feed parameters.
Wire stick-out
Stickout is the length of unmelted electrode extending from the tip of the contact tube, and it does not include arc length. Generally, flux-cored welding requires a stickout of around 3/4 inch, which is about twice the recommended stickout for MIG welding.
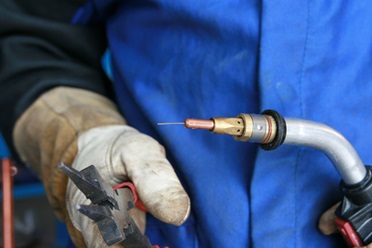
A stickout of approximately 3/4 inch is recommended for flux-cored welding.
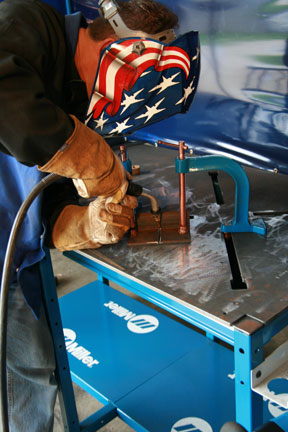
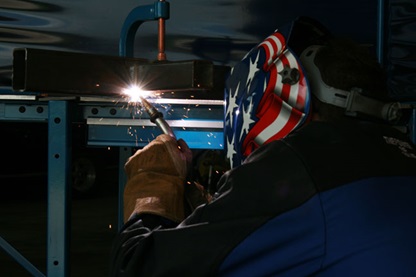
Push or drag?
With flux-cored welding, you should always use a drag (pull) technique. This involves pointing the tip of the welding gun back at the weld pool and dragging it away from the completed weld. An easy rule of thumb for remembering which technique to use is: “If there’s slag, you drag.”
Travel angle
Travel angle is the angle relative to the gun in a perpendicular position within the plane of the weld joint. Normal welding conditions in all positions call for a travel angle of 5 to 15 degrees. Travel angles beyond 20 to 25 degrees can lead to more spatter, less penetration and general arc instability.
Work angle
Work angle is the gun position relative to the plane of the welding joint, and it varies with each welding position and joint configuration (see below).
Flat position
- Butt weld (a 180-degree joint): Hold the gun at a 90-degree work angle (the same angle from each workpiece), directing the filler metal straight into the joint with a 5- to 15-degree travel angle. A small, side-to-side motion with the gun can help fill a large gap or when making multiple passes. A slight pause at the side of a weave bead can help avoid undercut.
- T-joint (a 90-degree joint; the type of weld on this joint is called a fillet weld): Keep the gun at a 45-degree angle, or equal distance from each piece. When making multiple weld passes, the work angles change slightly toward one side and then the other. This helps avoid uneven weld beads and undercuts.
- Lap joint (also a fillet weld): Angle the gun between 60 and 70 degrees to direct more heat into the bottom piece of metal. The thicker the metal being welded, the greater the angle.

Horizontal position
Because of the effects of gravity, the gun work angle must be dropped slightly by 0 to 15 degrees so that the welding gun is pointing upward toward the top piece of metal. Without changing the work angle, the filler metal may sag or rollover on the bottom side of the weld joint. The travel angle generally remains the same as for a weld joint in the flat position.
When making multi-pass welds on thick metal or to bridge a slight gap where fit-up is poor, a slight weave may be used to fill a weld joint. A slight hesitation at the top toe of the weld helps prevent undercut and ensure proper tie-in of the weld to the base metal. Voltage and amperage settings for flux-cored welding in the horizontal position are usually the same or slightly less than settings for welding in the flat position.
Angle the welding gun slightly upward for horizontal welds to accommodate for gravity.
Vertical positions
Vertical welding, both up and down, can be difficult. This makes pre-weld setup very important for producing high-quality welds. Since you are fighting gravity, consider reducing the voltage and amperage 10 to 15 percent from the settings for the same weld in the flat position.
- The vertical down technique helps when welding thin metals because the arc penetrates less due to the faster travel speed. When welding vertical down, begin at the top of a joint and weld down, weaving slightly side to side. For thin metal where burn-through is a concern, keep the electrode wire on the leading edge of the weld puddle.
- The vertical up technique is basically the same as vertical down but can provide better penetration on thicker materials (typically 1/4 inch or more). The travel angle of the gun is a 5 to 15 degree drop from the perpendicular position. Use a slight weaving motion.
Remember to weld upward for increased penetration and downward for thinner metals.
Overhead position
An overhead weld is the most difficult weld to make, and it should be avoided if possible. If you cannot avoid welding in the overhead position, try using the smallest wire possible, lowering your welding parameters by 15 to 20 percent, keeping your weaving to a minimum and maintaining a fast travel speed. Even following these tips, it still may be difficult to achieve a sound overhead weld.
Overhead welds are tricky. Use a thin wire, fast travel speed and
turn your electrical parameters down by 15 to 20 percent.
Successful flux-cored welding
Creating a successful flux-cored weld (or any arc weld for that matter) requires more than just memorizing the correct parameters and gun travel guidelines. Only through practice and learning to read the weld pool will you be able to consistently achieve sound flux-cored welds. With practice, you’ll begin to learn to troubleshoot and self-correct any shortcomings in your welds.
So, don’t get frustrated if your welds don’t look perfect on your first try. Just keep practicing and before you know it, you’ll be scouring your garage for new things to repair or fabricate!