TIG frequently asked questions
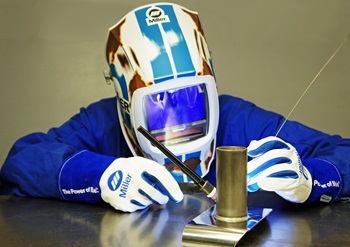
Just about everyone who tries TIG welding feels challenged at first. This is understandable, given all the things you have to watch for and think about, while simultaneously coordinating the motion of both hands. In most cases, a foot pedal or torch-mounted amperage control will be used — for starting, modulating and stopping the flow of current. I have coached many people as they learn these skills, and I have received my share of questions over the years. Here are a few frequently asked questions — and answers — that should be helpful, particularly for beginning and intermediate welders.
How does the TIG welding process work?
All welding requires the application of heat, which melts the metal being welded. With the TIG process, the heat comes from an electric arc that streams between the electrode in a hand-held torch and the metal being welded. The arc and molten metal are shielded by an inert gas, which protects the electrode and base metal from oxidizing. Filler rod is usually added to the puddle of molten metal as the weld progresses. The essence of making a good weld is heat control, which is governed by how you modulate the arc as it streams from the torch. Let’s look at this in detail.
The arc is shaped like a cone, with the tip at the electrode and the base on the metal being welded. The closer the electrode is held to the metal, the smaller the base of the cone — but as you pull the electrode farther away, the base (and puddle) gets larger. If the puddle gets too large, gravity will simply pull it away from the base metal, leaving a hole. This is why thin-gauge metals are especially challenging for beginners.
What are the best TIG welding techniques?
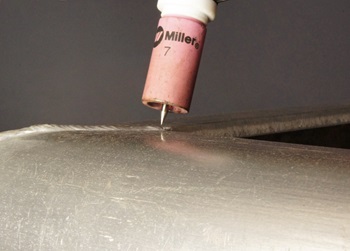
Perhaps the most important skill needed for TIG welding is moving the torch in a controlled manner, with steady forward movement, while keeping the gap between the tip of the electrode and the base metal consistently small — usually in the range of 1/8 inch to 3/16 inch. It requires a lot of practice to precisely control the arc length, keeping it as short as you can without allowing the electrode to touch the base metal or filler rod.
Should the electrode accidentally touch the metal or the filler, the electrode often becomes contaminated — meaning some of the rod or base metal gets stuck to it. Once the electrode is contaminated, the arc cone becomes misshapen, making it difficult or impossible to aim the arc with precision, and the boiling contaminants on the electrode may spit out impurities, further compounding your problems.
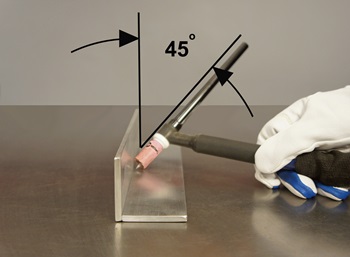
The angle between the torch and the base metal is important, too. You need to angle the torch slightly to see the puddle, and provide access for the filler rod. A 15-degree angle is a good starting place, although some welders prefer a bit more or less. If you hold the torch at 45 degrees (or more), you’re losing a lot of the coverage from shielding gas, and the flatter angle will make the puddle longer than it is wide. For the record, the torch is tipped with the electrode pointing forward, in the direction of motion.

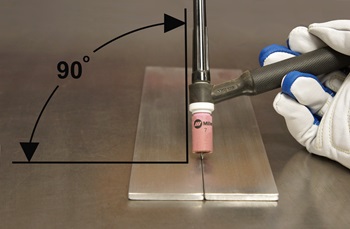
The “work” angle of the torch is also important. With a butt weld, the torch is normally at 90 degrees to the metal, as viewed from the end of the joint.
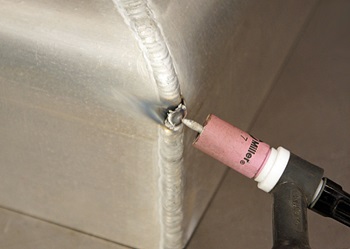
For making a fillet weld, where the pieces being joined are perpendicular, the work angle is usually 45 degrees, although you may need to modify this sometimes — like when joining metals of different thickness.
As you can see, there’s a lot going on as you are making a weld, and the key is controlling the angle, movement and distance of the torch in relation to the base metal. This requires making constant, minute adjustments with your torch hand. Simultaneously, the hand that feeds the rod has to move in concert, adding precisely the right amount of filler metal, deposited at the leading edge of the moving puddle, while always keeping the tip of the rod inside the small envelope of shielding gas — whew!
What are the best TIG welding tips and tricks?
Here are five tips that can help you attain this fine level of control.
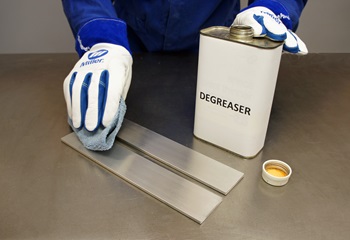
1. Make sure everything is ‘squeaky’ clean.
TIG welding is not tolerant of any contaminants. Be sure to clean your base metal with a good degreaser, BEFORE you scrub it with a dedicated wire brush. Do not use the same brush on different kinds of metal. Wipe the filler rod down with degreaser, too.
2. Get comfortable.
Whenever possible, I like to be seated when I’m welding. Even in situations where sitting isn’t possible, any little adjustments to my stance or body position that make me more comfortable will have a noticeable effect on the weld.
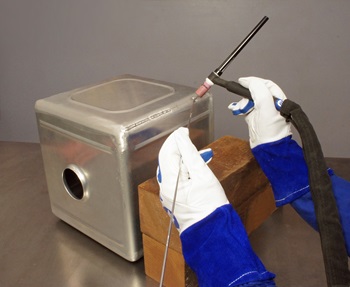
3. Look for ways to support your hands.
Having good support for your hands or arms is crucial for moving the torch with precise control. I do my best welding when the base of my hands or my wrists is supported in some way. Often you can rest your wrists on the part being welded. I keep an assortment of wood and metal blocks near my welding bench, and I often can get better support by positioning a block to rest my torch hand on. There are occasions where I rest my forearms, or even my elbows, on something for support. Many welders set up special support bars, positioned parallel to the joint being welded, and they slide their torch hand along the bar to help follow the joint with fine control. For some out-of-position work, I’ve had to rely on resting only my shoulder on something, and while not ideal, it’s better than having no support at all. Even placing my hip against something stationary can offer a bit of support, but I can’t weld very well when standing ‘free,’ with no support at all.
4. Do a practice run.
This may sound silly, but you’ll find that many professional welders do this before every pass. Get in the most comfortable position you can, with support blocks in place if helpful, and run your hands along the path they will traverse as you make the weld. You will often find that a slight adjustment of your position will allow you to make a longer pass, or to move your hands with less stress. Any strain in your position will have a negative impact on the weld. Also, you build valuable muscle memory when making your practice run, which will help keep everything on track when you make the ‘real’ pass.
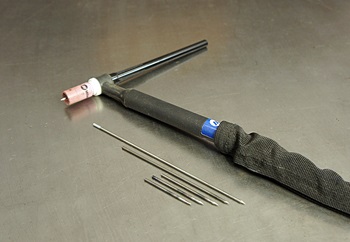
5. Clean a contaminated electrode immediately!
Every welder will contaminate their electrode at some point, but it’s essential that you replace a contaminated electrode immediately. I usually keep a group of pre-sharpened electrodes right on my welding bench, so I can swap them out without having to walk to my grinder.
I believe if you put these tips to use, you will very likely see an improvement in your TIG welds!
Want to access more TIG training materials? Check out these TIG welding guides.
About Ron Covell
Ron Covell is a talented welder and metalworker in the automotive industry. Covell is a contributor for Hot Rod Network, where he has a popular column titled, "Professor Hammer's Metalworking Tips." He also owns Covell Creative Metalworking, offers instructional metalworking DVDs and hosts workshops around the country.