AC TIG welding with the Multimatic® 220 AC/DC
I’ve been fascinated by sculpture for decades. Many years ago I went to art school with the idea of pursuing a career in sculpture. But after getting a master’s degree, the economic realities of the art world forced me to change direction. After much deliberation, I switched to the world of specialty automotive fabrication (which is actually a lot like doing metal sculpture). Still, I love the joy that comes when making “pure” art.
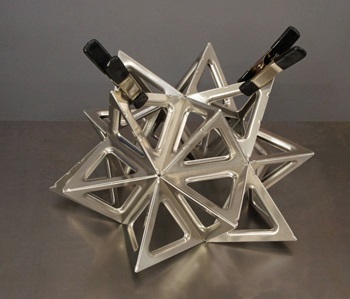
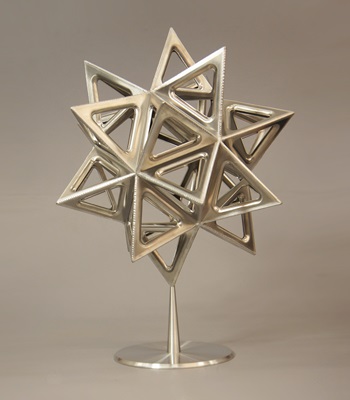
I’ve always had a strong interest in geometry, and I’m particularly intrigued with the Platonic solids. These are constructed of identical, regular faces — triangles, squares or pentagons — which fit together in elegant arrangements. The basis for this sculpture is the icosahedron, made from 20 equilateral triangles.
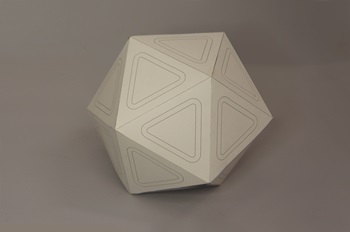
I’m using a stellated (star-like) version of this figure, with each of the 20 faces extended with three more equilateral triangles.
I used .063-inch 3003 H-14 aluminum sheet, and I designed the sculpture with a hole in each face, knowing this would open it up and introduce a light and airy character. I recently got a set of the triangle punch and flare dies, which were ideal for perforating each face. I chose the 2-1/2-inch die, with a 5/8-inch border around each opening. This resulted in a sculpture about 16 inches in diameter.
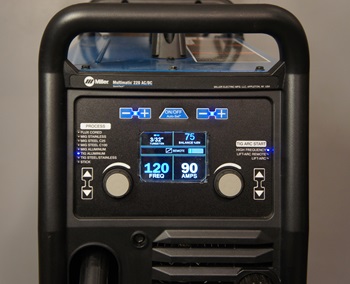
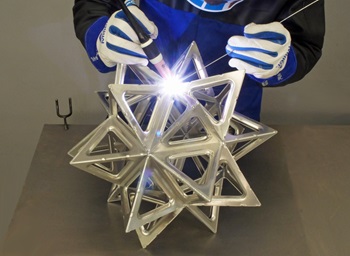
I used the brand-new Miller® Multimatic220 AC/DC to weld this sculpture, making full use of its newly added AC TIG capabilities.
The sculpture required A LOT of welding, so I looked for any way to streamline the construction. I realized I could combine two triangles as one element, joined at the valley by a fold, which cut the number of pieces from 60 to 30. This eliminated a considerable amount of welding and made the assembly easier too.
Next, I looked for a way to make each element with precision. When fitting components together to make a closed shape, even tiny irregularities can stack up, leading to problems.
If I punched and flared the holes after the triangles were cut to size, the drawing action of the dies would distort the narrow edges. That’s a big problem for welding thin sheet metal, so I punched the holes before the edges were trimmed to size. The punch and flare dies require flat metal where they strike, so I had to make the center bend after all the openings were punched.
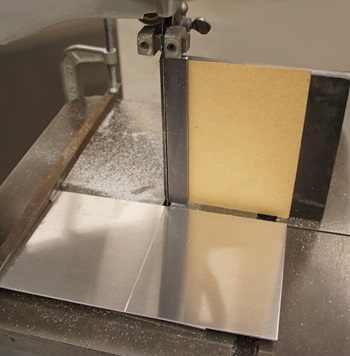
A press brake would have been ideal for making the bend in the part, but I don’t have one, so I devised another approach. I cut a groove on the back side of the aluminum blank, which located the bend precisely, and this enabled me to bend the part with light pressure. I made a backstop for my band saw that limited the depth of cut to about .035 inches, and with the part held vertically, I cut a groove on the back side of each blank.
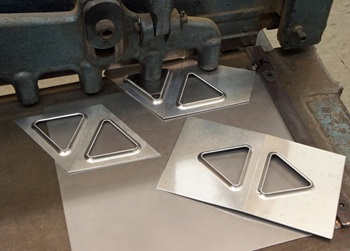
Next, I made holes in each blank for the guide pins of the punch and flare dies. Each opening requires two 1/2-inch-diameter holes, so I made four holes in each blank, spaced equally from the bend line. Next, I used the dies in a hydraulic press to make two openings in each blank.
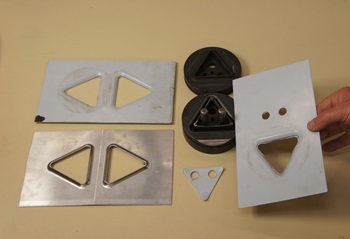
After the holes were punched, I trimmed the edges of each blank. I made a fixture for my shear, which located the blank by the triangular openings, and trimmed all four edges.
With the relief cut in the back of each blank, it was easy to bend them to 85 degrees — forming two faces from one blank. With all the elements prepared, it was time to join them together. The Pro-Set™ technology on the Multimatic 220 AC/DC is great: As you change the parameters on the digital face panel, the numbers turn blue when you’re in the recommended expert settings. I used 90 amps and 120 hertz, with a balance of 75 percent electrode negative. My electrode is 3/32-inch 2 percent ceriated tungsten, sharpened to a fine point.
I started with groups of three elements, tack welding them at the tips.
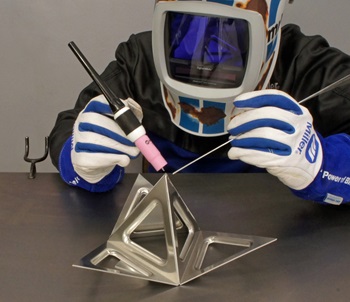
After joining the tips, I made several tack welds along the edges of each assembly. I found I could fusion weld these tacks, since the fit-up of the sheared edges was very tight.
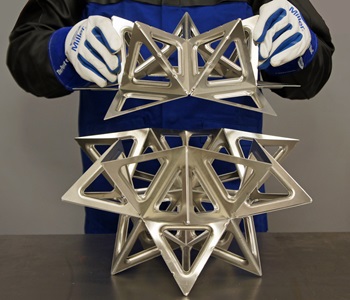
Next, I started joining these sub-assemblies into more complex arrangements. Since each element was made precisely, they fit together with no problem, and the angles between each segment aligned themselves with only light clamping pressure.
I’ve had experiences with similar projects where the last piece didn’t fit due to the stacking up of minute irregularities. Keeping this in mind, I divided the sculpture into two main segments with a joint near the equator, which gave me the most leeway for the final alignment. I was able to join the two sections with only a small amount of tweaking of the angles between segments.
My strategy worked to perfection, and I didn’t need to trim any edges or fill any gaps. Any misalignment was easily corrected with light clamping pressure.
With all the segments joined, I finish welded every joint. My fit-up was very tight, and because I cleaned each joint with degreaser and light wire brushing, I was able to fusion weld all the edges. While welding, I kept a piece of 1/16-inch 1100 welding rod in my left hand, ready to fill any keyholes that might appear.
I started welding at the center of each cluster of triangles and worked out to the points. I had to reduce the amperage with the foot pedal as I approached the end of the weld since the heat built up quickly as I neared the tips of the triangles. This sculpture required 300 inches of welding to complete!
This sculpture was lots of fun to build, and I look forward to doing more work of this nature. I enjoyed exploring the new features of my Multimatic 220 AC/DC, and it handled the intricate joints with ease!
About Ron Covell
Ron Covell is a talented welder and metalworker in the automotive industry. Covell is a contributor for Hot Rod Network, where he has a popular column titled, "Professor Hammer's Metalworking Tips." He also owns Covell Creative Metalworking, offers instructional metalworking DVDs and hosts workshops around the country.